Install and setup of Linux CentOS 7 as a server
Created: 2019-03-04 23:28:14 | Last modified: 2021-01-18 00:01:18 | By: NovaAccess: Read | Visibility: Public, Users | Views: 259 | Rating: N/A | Tags: centos centos setup
How to install and setup CentOS 7 as a server. This will example will setup CentOS 7 as a basic server with no GUI, just a BASH CLI.
Server Installation & Options
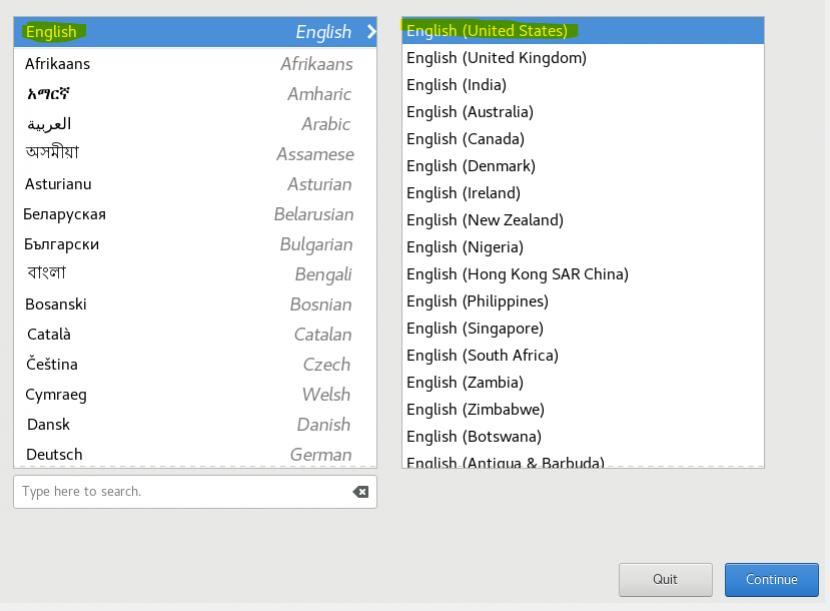
1. First select your language and country from the initial install box
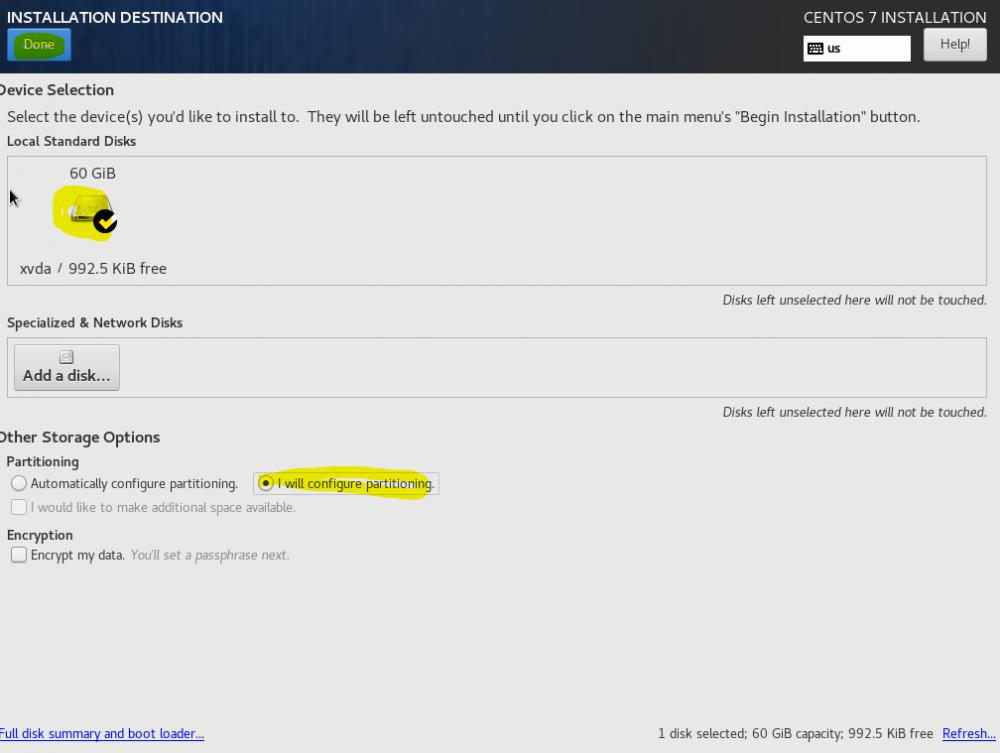
2. Now you need to select your installation destination, click the button below to do this

3. Make sure the drive you want to install on is selected. If you are new to Linux, use the automatic selection and then press the done button. If you would like to have more control of how the partitioning layout is done, select I will configure partitioning button
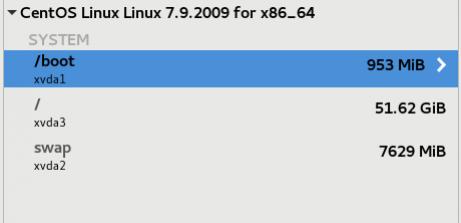
3.1. If you have selected 'Automatically configure partitioning', you can skip this step. Because we are creating a VM and we will only ever need to expand a partition which will be the root (/) we want to disable LVM and assign the partitions in the correct order. First we create a boot partition with a size of 1GB, then we create a swap partition with at least the same amount as the RAM installed in the server, and the reaming space is used for the root partition. Note: when adding these in Centos 7, you can use works work '1GB' and 'MAX' in the size fields to get the correct sizes.
4. You can select what software you wish to install by clicking the 'Software Selection' button and selecting the packages you wish to install. If you don't select anything like I have, it will do a minimal installation which is an installation with the minimum number of packages to make the server run. This is useful as you don't fill the server with unrequired services

4.1 You are now ready to begin your installation

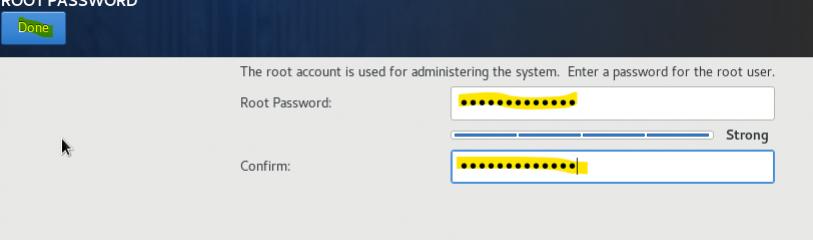
5. While the system is installing, you should create a root password and optionally create other users on the system
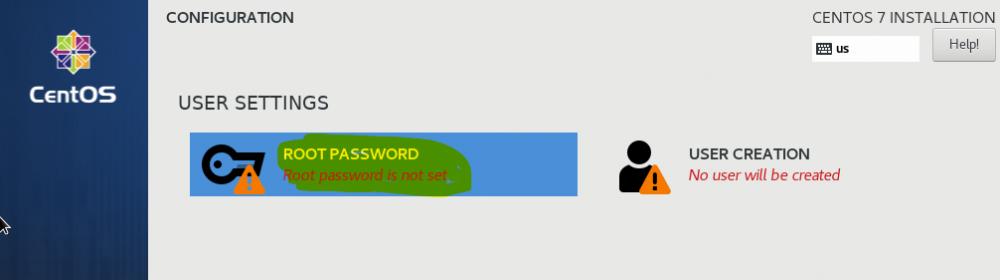
5.1 Enter in your desired passwords and select the done button
6. System will install all the required packages, when done select the reboot button on the bottom right hand side to restart the server and boot into your system

7. Once you have booted in your system, run updates by typing the following
yum -y update
7.1 you can optionally add base tools which gives you more tools to manage the server
yum -y groupinstall Base
Network Setup
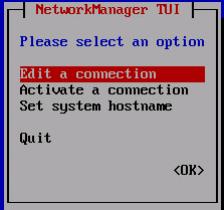
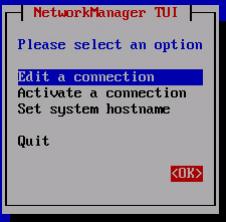
The simplest way to setup the network is to use the inbuilt network setup called "Network Manager Text User Interface" (nmtui). You can navigate around NMTUI using the tab and enter keys.
On the CLI, enter in the following to start the Network Manager.
nmtui
- Edit the connection
- Select the interface you wish to edit and click Add

- Setup the IP addresses on the interface, also check the "Automatically connect" checkbox, then click OK. Note enter in the IP address along with the network mask e.g. 10.30.0.85/24
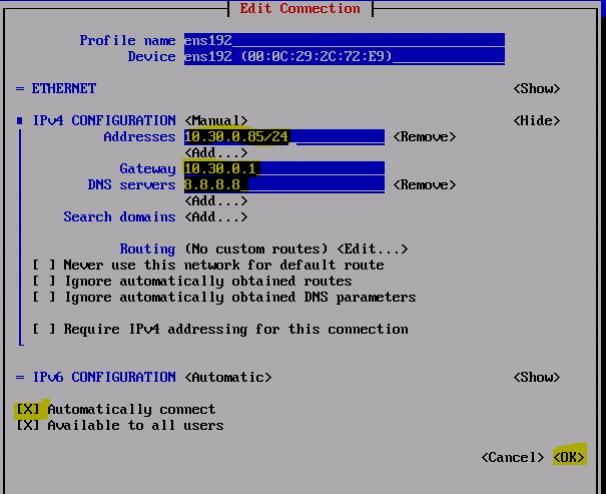
- Click the back button to go back to the main window

- Click OK to save and exit back to the CLI
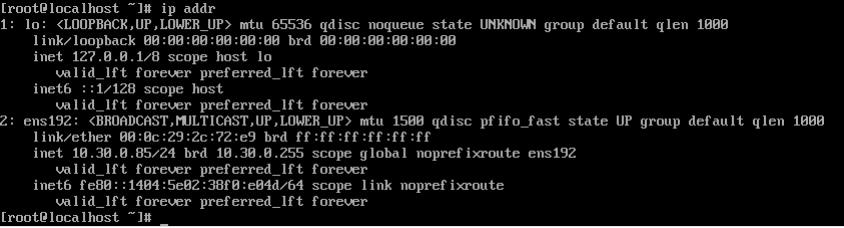
- if you run an "ip addr" command, you will see the IP address has been assigned. If you need to make a change in nmtui, you may need to do a "systemctl restart network" to make the changes take effect.